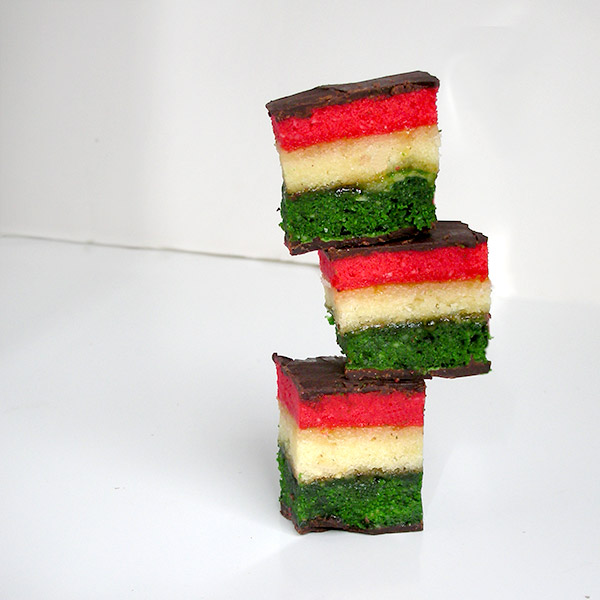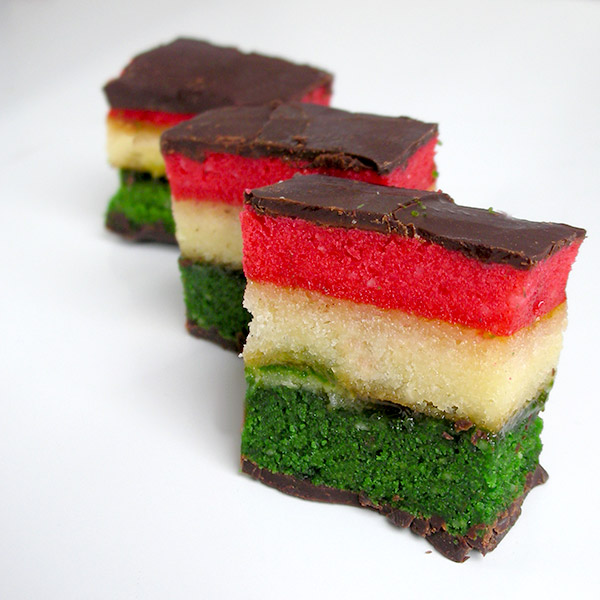
Holiday season is the time for sharing and Peta of Peta Eats is sharing a dozen cookies, some classics and some of her own, from all over the world with us.
Um… HELLO! Best Daring Bakers Challenge so far! I LOVE cookies so I was super excited for this one! We had 12 different types of cookies to choose from, such as ladyfingers, shortbread, crinkle cookies, sables, etc., but I chose one that reminds me of my BFF and his mom. Every year at Christmas she would make these cookies and my friend would (and still does) go crazy over them! In high school, I didn’t like almond-flavored things very much, and these are heavy on the almond taste, but the times have changed. These cookies are so delcious. I’ve had three already today and you’d be kidding to think I wasn’t chomping down on the “scraps” that are cut off the sides to create nice even edges.
As usual, this was definitely a CHALLENGE, but not as difficult as past recipes. First of all, I think I’ve finally learned my lesson and I need to get a thermometer for the inside of my oven. This recipe suggests a bake time of 8-10 minutes and specifies the cookie won’t
Then there’s the whole thing about how my light colored wood island is now speckled with red food coloring. TIP: Put some paper towels or something down on your work surface before you measure out your tablespoons of food coloring. Sigh.
Other than that… These cookies are super fun to bake, assemble, and cut. Even though my cuts weren’t that even. Oops. I loved the process so much that I want to do a series of layered cookies with different flavorings and colors!

Ingredients
- 4 large eggs, separated
- 1-1/2 cups sugar, divided
- 1 cup (4-1/2 oz) almond meal
- 1-1/4 cups (10 oz) unsalted butter, softened
- 1 teaspoon almond extract
- 1 teaspoon vanilla extract (or since it is Christmas some brandy or rum extract)
- 2 cups all-purpose (plain) flour
- 1/2 teaspoon salt
- 1 tablespoon red food colouring
- 1 tablespoon green food colouring
- 1 cup (12 oz) apricot jam heated and strained
- 1 cup plus 2 tablespoons (7 oz) fine-quality bittersweet chocolate (not unsweetened)
- 1 teaspoon butter
- 1 teaspoon sugar
1. Put an oven rack in the middle position and preheat oven to 350°F.
2. Line a 13-inch by 9-inch baking pan baking paper, leaving a 2-inch overhang on 2 ends.
3. Beat egg whites in mixer fitted with whisk attachment at medium-high speed until they just hold soft peaks. Add 1/4 cup of the sugar gradually, beating at high speed until whites hold just stiff, slightly glossy peaks. Put this in another bowl as you’ll need the mixer bowl for the next step.
4. Switch to your paddle attachment, then beat together the ground almonds, butter and the remaining sugar until its pale and fluffy. Add the egg yolks, vanilla and almond extract and beat until it’s combined well. Turn off the mixer and add the flour and salt and mix until just combined. I have to put a tea towel over the mixer to stop the flour flying everywhere.
5. Beat 1/3 of the egg white mixture into the almond mixture then remove the bowl from the mixer and fold in remaining whites gently but thoroughly.
6. Divide batter among 3 bowls. Stir red food colouring into one and green food colouring into another, leaving the third batch plain. Set the white batter aside. Put the green batter, covered into the refrigerator.
7. Pour the red batter into the prepared pan and spread evenly with an offset spatula (layer will be about 1/4-inch thick).
8. Bake in a preheated oven 8 to 10 minutes, until just set. (The cakes won’t look cooked but a tester does come out clean.)
9. Using the paper overhang, transfer the layers to a rack to cool, about 15 minutes. Clean the pan and re-line with parchment paper. Bake the white layer in prepared pan for 8 to 10 minutes, until just set. As white layer bakes, bring green batter to room temperature. Transfer the white layer to a rack. Prepare the pan again and bake the green layer in the same manner as before. Transfer to a rack to cool.
10. When all layers are cool, invert green onto a parchment lined large baking sheet. Discard paper from layer and spread with half of the preserves. Invert white on top of green layer, discarding paper. Spread with the remaining preserve. Invert red layer on top of white layer and discard wax or parchment paper.
11. Cover with plastic wrap and weight with a large baking pan and 6 tins of fruit or soup. Chill at least 8 hours.
12. Remove weight and plastic wrap. Bring the layers to room temperature.
13. Chop the chocolate into small bits put half the chocolate, 1 teaspoon of butter and 1 teaspoon of sugar in a double boiler or a metal bowl set over a saucepan of barely simmering water, once it’s melted and smooth take the bowl off the pan of water and turn off the heat. Throw in the rest of the chocolate and stir until it’s smooth. Put the bowl of chocolate back over the water you don’t want it too start to set.
14. Trim the edges of assembled layers with a long serrated knife. Quickly spread half of chocolate in a thin layer on top of cake. Chill, uncovered, until chocolate is firm, about 15 minutes. Cover with another sheet of wax paper and place another baking sheet on top, then invert cake onto sheet and remove paper. Quickly spread with remaining chocolate. Freeze until firm, at least 1 hour. You can freeze the whole thing like this until you want to use it. Don’t thaw it before cutting.
15. Cut into 1-inch squares or into 1-1/2 inches wide strips then cut the strips crosswise into 3/4-inch wide cookies.
Important notes from Smitten Kitchen
1. Don’t stack cooled cakes if you use wax paper: they might stick together or if you get grease on the top and bottom the chocolate doesn’t stick well.
2. Be careful dividing your jam: Heat the jam, strain out any lumps and then weigh it or use only enough to put a thin even layer over the layers. Too much jam and it oozes out and makes it harder to cut.
3. Cookies keep, layered between sheets of wax paper or parchment, in an airtight container at room temperature 2 weeks. They’ll keep even longer in the freezer.
